PUNCTURE, EMERGENCY SPARE WHEEL


On equipped vehicles, this is located underneath the chassis.
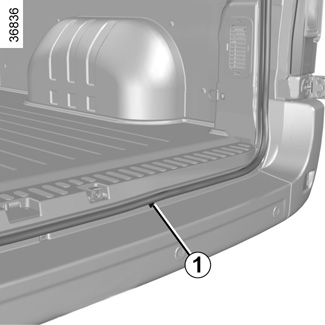
To remove the emergency spare wheel
- Insert the end of the unlocking key 3 extended (depending on the vehicle) by the hexagonal extension piece 5 and the wheelbrace 6 in location 1 or 4 (the use of other tools could damage the mechanism);
- lower the emergency spare wheel fully;
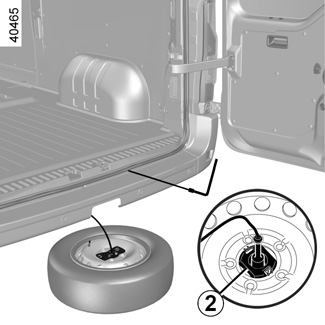
- unclip the component 2 on the wheel rim;
- thread the component 2 through the wheel rim (as shown in A) to release the wheel.
If the emergency spare wheel has been stored for several years, have it checked by your dealer to ensure that it is safe to use.
In some cases (puncture at the rear, vehicle with towing equipment, etc.) it may be necessary to lift the vehicle beforehand (via the lifting point closest to the affected wheel) to provide access to the emergency spare wheel (please refer to the information on “changing a wheel: vehicle with standard wheels” in Section 5).
To fit a wheel
Proceed in the reverse order.
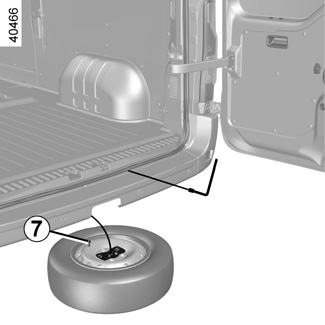
- place the wheel flat underneath the vehicle. The valve 7 must be facing you. Risk of losing the wheel if the correct direction for refitting the wheel is not observed;
- thread the cable and the component 2 through the wheel rim;
- centre the component 2 in the middle of the wheel and clip it to the wheel rim;
- lift the retaining cable up as far as it will go and check the wheel is completely secure.
Note: do not place a punctured wheel with aluminium wheel rims in the emergency spare wheel winch. Ensure the winch is refitted correctly.
Place the punctured wheel flat on the ground. The valve 7 must be facing you. Risk of losing the wheel.
Do not touch the exhaust system.
Risk of burns.