Back to the list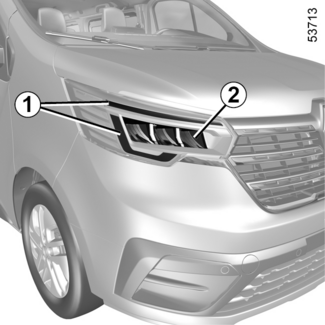
Exterior lighting: replacing bulbs
Exterior lighting: replacing bulbs
Front and side headlights
WARNING
Please note when working close to the engine that it may be hot. The engine cooling
fan may also start at any moment. The  label in the engine compartment reminds you of this.
Risk of injury.
WARNING
Any operation on (or modification to) the electrical system must be performed by an
approved Dealer since an incorrect connection might damage the electrical equipment
(harness, components and in particular the alternator). In addition, your Dealer has
all the parts required for fitting these units.
WARNING
Before carrying out any action in the engine compartment, you must switch off the
ignition STARTING, STOPPING THE ENGINE.
LED daytime running lights and direction indicator lights 1

Consult an approved dealer.
LED main beam headlights 2
Consult an approved dealer.
Tip
To comply with local legislation, or as a precaution, you can obtain an emergency
kit containing a set of spare bulbs and fuses from an approved dealer.
WARNING
The bulbs are under pressure and may break when replaced.
Risk of injury.
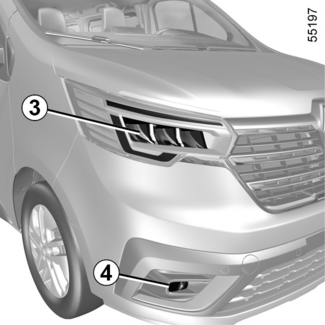
LED dipped beam headlights 3

Consult an approved dealer.
LED fog lights 4
Consult an approved dealer.
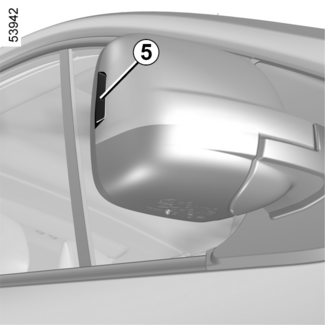
LED side repeaters 5

Consult an approved dealer.
Additional lights
If you wish to fit fog lights or long-range headlights to your vehicle, consult an
approved dealer.
WARNING
The bulbs are under pressure and may break when replaced.
Risk of injury.
Rear lights
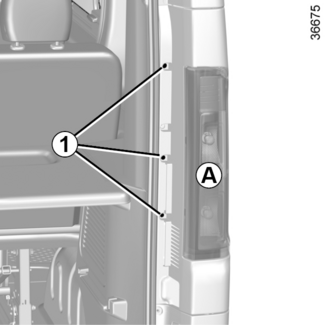
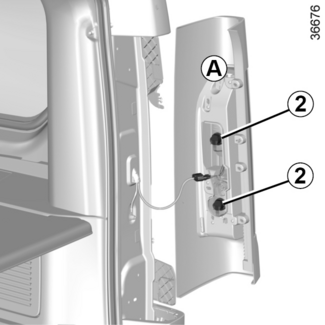
Rear lights unit A

Remove the bolts 1.
WARNING
The bulbs are under pressure and may break when replaced.
Risk of injury.

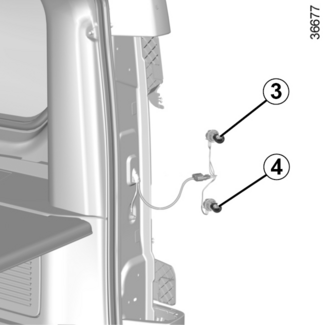
Turn the lights unit slightly and release it to access the bulb holder 2.
Unclip the bulb holders by rotating them a quarter of a turn.
Unclip the bulbs by pressing them slightly and rotating them a quarter of a turn.

Direction indicator lights3
Pear-shaped, bayonet type bulb PY 21W.
Side and brake lights4
Pear-shaped, bayonet type bulb P 21/5W.
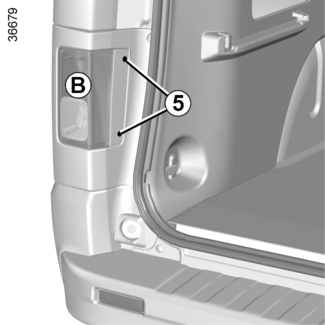
Rear lights unit B

Remove the bolts 5.
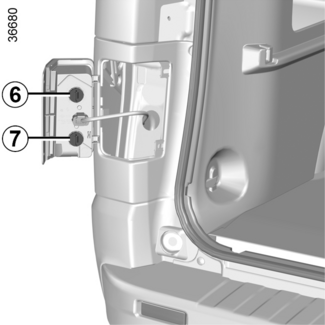
Release the headlight unit.
Turn the bulb holder 6 or 7 and release it.
Replace the bulb concerned.
Refit the bulb holder and secure it by turning.
Check that it is securely mounted.
Reposition the headlight unit and screw it in place.

- 6.
- (driver’s side only)
- Fog light
- Pear-shaped, bayonet type bulb W16W.
- 7.
- Reversing light
- Pear-shaped, bayonet type bulb W16W.
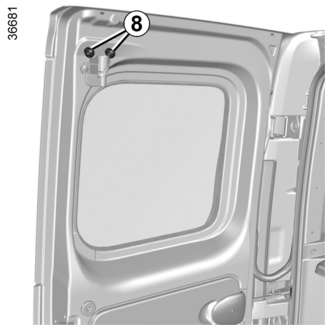
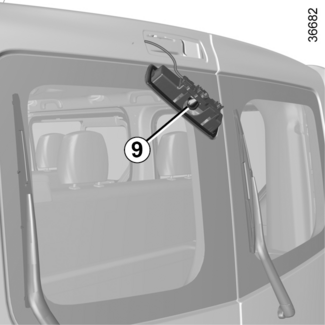
High-level brake light on rear hinged doors

Remove the nuts 8.

Remove the light sideways from the outside to access the bulb 9.
Pear-shaped, bayonet type bulb P 21W.
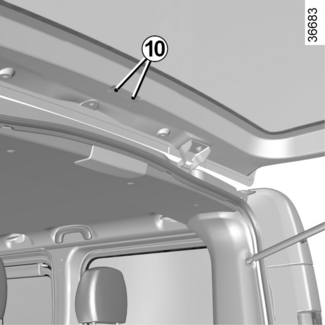
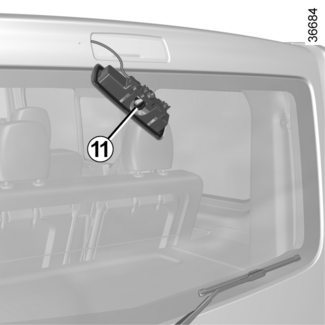
High-mounted brake light on tailgate

Remove the nuts 10.

Remove the light from the outside to access the bulb 11.
Pear-shaped, bayonet type bulb P 21W.
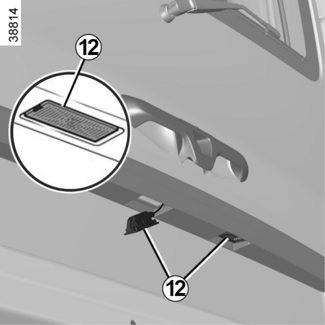
Number plate lights

The bulb is accessed in the same way for both vehicles with hinged doors and those
with the tailgate.
Unclip the light 12 (using a tool such as a flat-blade screwdriver).
Remove the light cover to gain access to the bulb.
Bulb type: W5W.