ENTERING A DESTINATION
| “Navigation” menu |

From the home screen, press the card or press “Menu”, then “Navigation”.
Using voice recognition to enter an address
Press the voice recognition button , then following the sound signal you will be able to dictate a destination town, number and/or street name and/or area. For more information, see the section on “Using voice recognition”.
Note: the position of the voice recognition button may vary. Please refer to the vehicle user manual for further information.
Precautions regarding navigation
Use of the navigation system does not in any way replace the responsibility or vigilance of the driver when driving the vehicle.
Destination in a foreign country
The country must be changed before you say the address. Press the voice control button to display the main voice control menu.
After the beep, say “Change country”, then say the country in which you wish to carry out your search. After the second beep, say your destination address.
Note: you can change country as long as the country is supported by the system language.
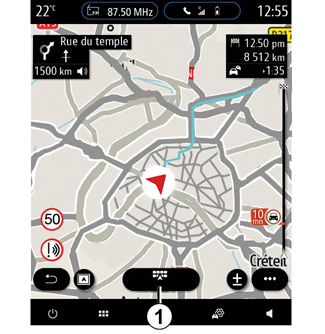
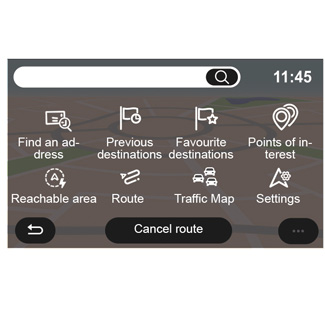
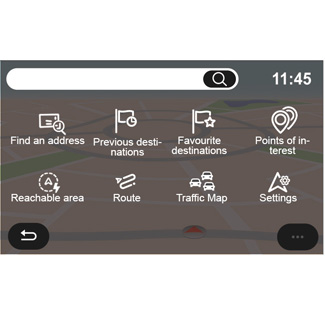
Use the navigation menu 1 to access the following functions:
- “Find an address”;
- “Previous destinations”;
- “Favourite destinations”;
- “Coordinates”;
- “Points of interest”;
- “Reachable area”;
- “Route”;
- “Traffic Map”;
- “Settings”;
-...
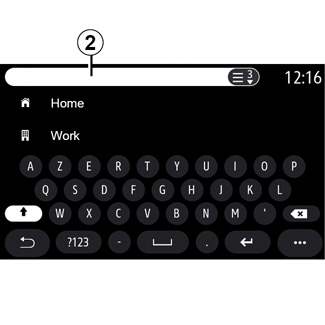
Online Search
Use the Online Search function for a quick and precise search.
As soon as you enter the first letters in the search field 2, the multimedia system suggests a relevant street name, town or POI (point of interest).
Press the 3 button to view the full list of suggestions.
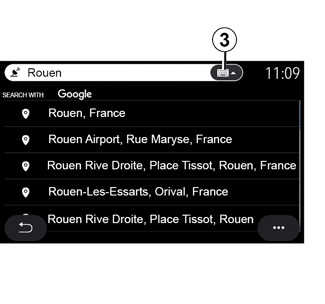
For example: “Rouen”.
Note: additional information provided by your multimedia system may vary, depending on your connection type.
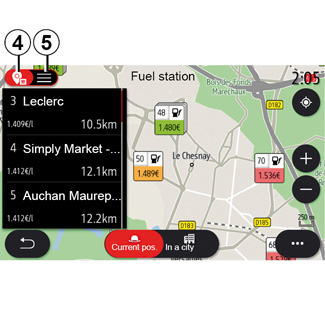
When searching for a Point of Interest (POI) via the “Navigation” menu, you can display a list 5 of suggestions.
For more information on POI, see “Points of interest” in this section.
The map display 4 shows the geographical position for each suggestion.
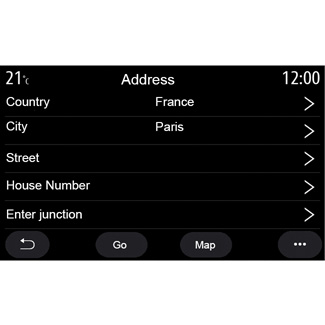
| Find an address |
From this menu you can enter a complete or partial address: country, town, post code, street, number, etc. On first use, the system asks you to choose the destination country. Enter the town/city name or a postcode using the keypad. | |

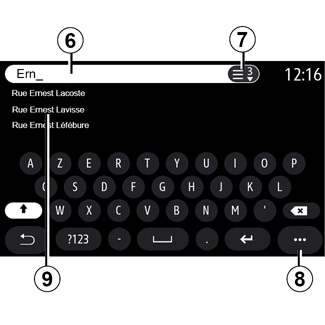
From the search area 6 enter a street name.
When you start entering letters, the system suggests similar street names. You can:
- press the street name displayed on-screen to confirm your selection;
- press the 7 button or scan the list 9 of the suggested streets to access the full list corresponding to your search.
Note:
- the system will store the last towns/cities entered in its memory;
- only addresses known to the system through the digital map are authorised.
Use the pop-up menu 8 to:
- save the selected address to your favourites;
- enter the destination co-ordinates (latitude and longitude values);
- find and show any nearby POI;
-...
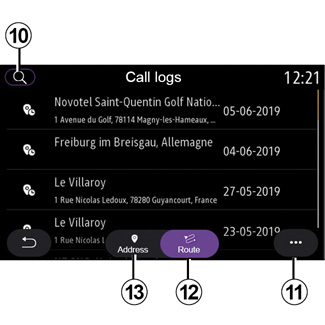
| “Previous destinations” |
Use this menu to select a destination from the list of recently used addresses. These are automatically stored. From the “Address” tab 13 you can access the stored destination history. Select a destination to start guidance. | |

Use the “Route” tab 12 to access the route history. Select a route to start guidance.
Use the magnifying glass 10 to search for an address or route saved in the history.
From the pop-up menu you can 11 access the “Address” 13 and “Route” tabs 12 to:
- “Delete” one or more of the addresses selected;
- “Delete all”;
- “Sort by date”;
- “Sort by name”;
- “Save as favourite”.
During guidance, when you search for a new destination you can set it as either:
- a waypoint;
- a new destination.
For safety reasons, carry out these operations when the vehicle is stationary.
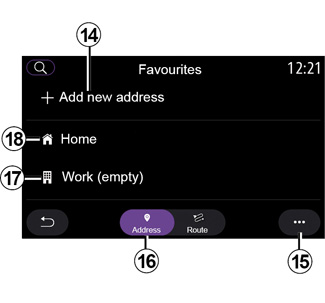
| “Favourite destinations” |
From the “Address” tab 16, you can: - “Add new address”; - run navigation guidance to your Home 18 or place of Work 17; - run navigation guidance to an address saved in your favourites. | |

When you select “Home” 18 or “Work” 17 for the first time, the system asks you to register an address.
Note: only one “Home” address and “Work” address can be saved by the multimedia system.
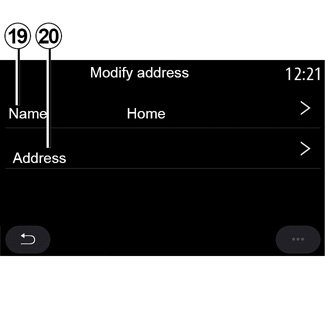
From the “Add new address” tab 14, you can:
- “Name” 19 to name your new favourite destination;
- “Address” 20 to access the following search functions:
- “Find an address”;
- “Previous destinations”;
- “Points of interest”;
- “Coordinates”;
- “On map”;
- “Current position”.
- “Personal ePOI”;
- “Phone”;
- “Charge type”.
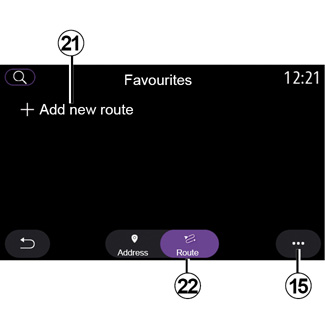
From the “Route” tab 22, you can:
- “Add new route”;
- run a route saved in your favourites.
From the “Add new route” tab 21, you can:
- “Name” to name your new favourite route;
- “Route” to access the following search options:
- “Start position”;
- “Add as waypoint”;
- “Last destination used”;
- “Add as destination”.
Following the Add as a stop and Add as destination searches, you have the following options:
- “Find an address”;
- “Previous destinations”;
- “Points of interest”;
- “Coordinates”;
- “On map”.
Use the pop-up menu 15 to:
- “Edit”:
- “Name” 19 of the favourite;
- Address 20 or Route of the favourite, depending on the tab selected.
- Delete (select one or more addresses);
- “Delete all”;
- “Sort by name”.
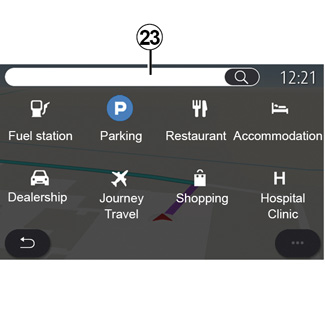
| “Points of interest” |

A point of interest POI is a service, establishment or tourist attraction close to a location (start point, destination city, en route etc.).
The points of interest are grouped by category: Fuel station, Parking, Accommodation etc.
Select the “Navigation” menu, then “Points of interest” to select a destination from points of interest.
“Search by name”
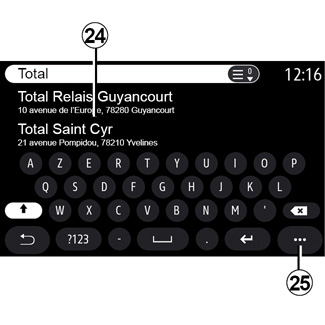
In the search field 23, enter a POI category (name of a restaurant, shop etc.).
Select a POI from the list of results 24.
Note: services must be activated in order to display to search of Points of Interests online. Please see the section entitled “Activating services”.
Use the pop-up menu 25 to:
- “Reset” the search;
- choose the keyboard type;
- “Alphabetic”;
- “Azerty”;
- “Qwerty”.
“Search by category”
The navigation system suggests several POI in the category selected, according to the tab selected:
- no route in progress:
- “Nearby”;
- “In a city” (enter town name).
- when a route is in progress:
- “On route”;
- “Destination”;
- “Nearby”;
- “In a city” (enter town name).
Use the pop-up menu 25 to:
- display “Offline results”:
- “Sort by distance”.
For safety reasons, carry out these operations when the vehicle is stationary.
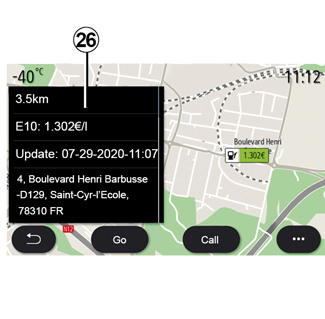
From the list 24 you can select POI results.
Depending on the equipment, the multimedia system can be used to:
- you can contact certain POI directly (e.g. to reserve a place or for information) by pressing “Call”;
- start navigation towards the selected POI by pressing Go;
- preview the destination location using the display 26.
From the pop-up menu, you can add the address in your favourites.
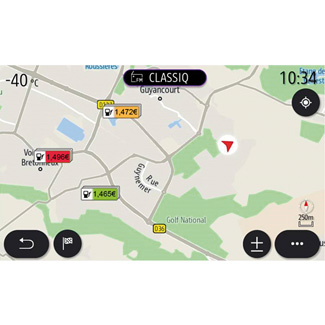
Fuel prices
The Fuel station POI shows the petrol stations around your position, as well as the price of fuel for your vehicle.
The price of fuel is associated to a colour indicator:
- Green: petrol stations offering the lowest prices;
- Orange: petrol stations offering average prices;
- Red: petrol stations offering the highest prices.
Note: services must be activated in order to display the fuel price. Please see the section entitled “Activating services”.
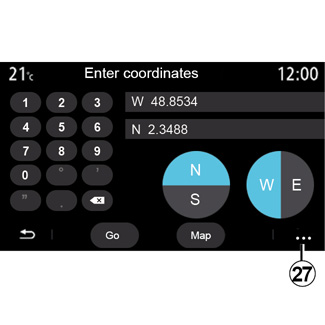
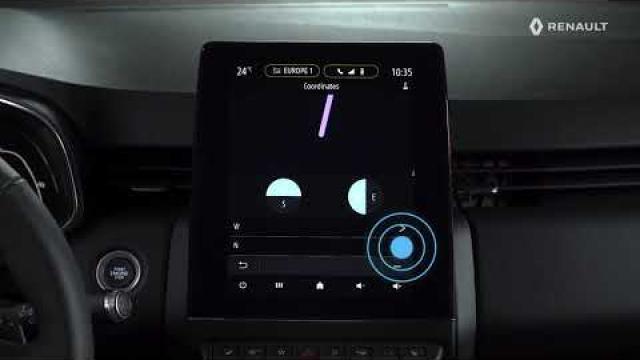
| “Coordinates” |

From the “Navigation” menu, press “Coordinates”.
Use this menu to search for a destination by entering its coordinates.
You can select the hemisphere then enter the “Latitude” and “Longitude” values using the keypad.
Once the coordinates have been entered, press Go to go directly to this destination or press Map to view the details on the map.
From the pop-up menu 27, press:
- “UTM” to enter coordinates in UTM format;
- “Units and formats”: decimal degrees; decimal degrees and minutes; decimal degrees, minutes and seconds;
- “Save as favourite”.
For safety reasons, carry out these operations when the vehicle is stationary.
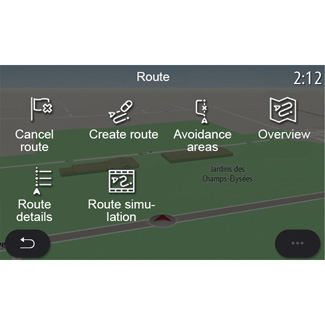
| “Route” |
Use this function to manage a destination with associated stops. On the main menu, press Navigation > Menu > Route to access the Route menus. | |

No route in progress:
- “Create route”;
- “Avoidance areas”.
When a route is in progress:
- “Cancel route”;
- “Modify route”;
- “Avoidance areas”;
- “Overview”;
- “Route details”;
- “Route simulation”.
“Cancel route”
Use this function to cancel the current route.
“Modify route”
Use this function to modify your current route:
- “Start position”;
- “Add as waypoint”;
- “Add as destination”.
The Add a stop and Add as a destination functions offer the following options:
- “Find an address”;
- “Previous destinations”;
- “Points of interest”;
- “Coordinates”;
- “On map”;
-...
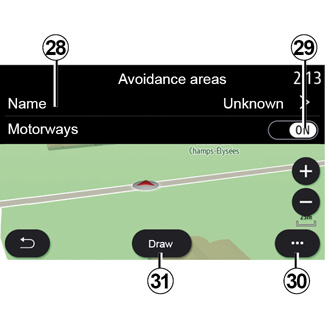
“Avoidance areas”
Use this function to avoid a set or defined geographical area.
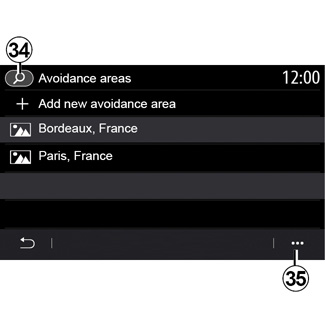
From the “Avoidance areas” menu, press “Add new avoidance area” or select previously stored areas. Press “Name” 28 to change it using the keypad.
Choose to avoid a certain sections of motorway using the 29 button.
From the 30 pop-up menu, press “Select city” to manually enter the country and town.
Press the “Draw” button 31 to designate an area to avoid.
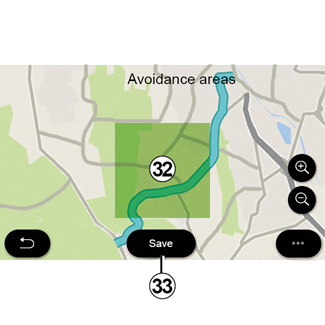
Briefly press the map to display the “Avoidance areas” 32.
Pinch/spread to enlarge or reduce the area selected.
Press the “Save” button 33 to add the selected area to the list of areas to avoid.
To modify a “Avoidance areas”, select it from the list of areas to be avoided and press the “Edit” button on the map.
From the pop-up menu 35 of the Avoidance areas menu, press:
- “Delete“ (select one or more areas to be avoided);
- “Delete all”.
By pressing the magnifying glass 34 you can search for stored areas to avoid.
For safety reasons, carry out these operations when the vehicle is stationary.
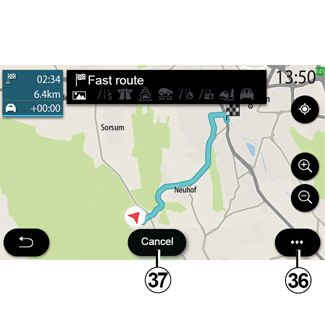
“Overview”
Use this function to view all of your route on a map.
To use this function, launch navigation then press on “Route” in the navigation menu, then “Overview”.
Press the 37 button to cancel the current route.
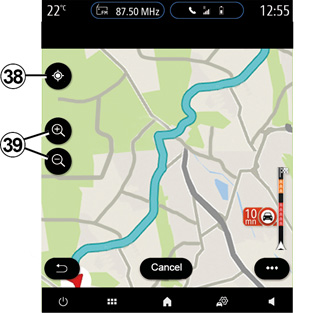
To explore the map of the route in progress, move the map by keeping your finger pressed on a part of the screen, while dragging it.
Press the zoom in/out buttons 39 to adjust the map.
To re-centre the map, press the 38 control.
The pop-up menu 36 offers the following options:
- “Alternative routes”;
- “Route details”;
- “Route simulation”;
- “Save as favourite”;
- “Settings”;
-...
Note: the functions offered in the pop-up menu will vary depending on whether the guidance is activated or not.
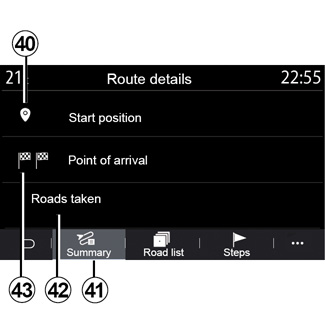
“Route details”
Use this function to view all the information and details for the route via several tabs:
- “Summary”;
- “Road list”;
- “Steps”.
From the Summary tab 41, you can view your:
- “Start position” 40;
- “Point of arrival” 43;
- “Roads taken” 42 (toll road, ferry, railway ferry, etc.).
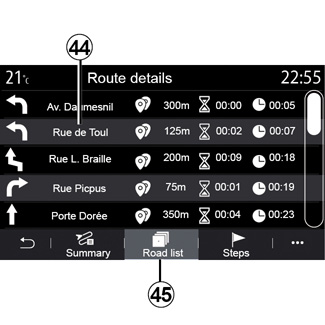
From the Road list tab 45 you can view the route in detail.
From the list 44 of roads to be taken along the route, you can view different directions, names of streets taken, distance remaining and time for each stage.
Press on one of the routes 44 to view it on the map with the possibility of moving back to previous stages or forward to following stages using the arrows 48.
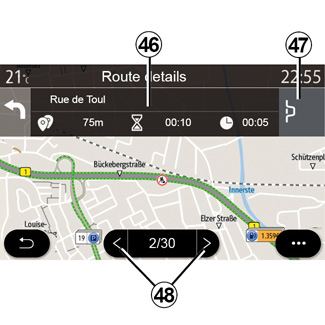
The 46 bar will display information on each stage (distance, stage time and arrival time).
The navigation system may suggest that you avoid an event on one of your stages.
Press the Detour button 47 and the navigation system will calculate a detour route.
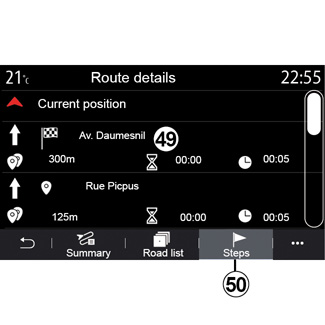
From the Steps 50 tab, you can see the different stages of your trip (distance, journey time and arrival time).
By pressing on one of the stages in the 49 list, you can access the location, name, full address and geographical coordinates of the location.
For safety reasons, carry out these operations when the vehicle is stationary.
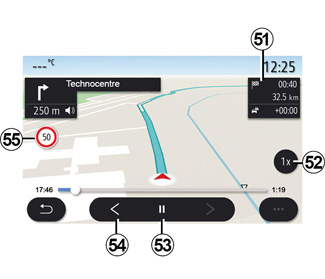
“Route simulation”
Use this function to simulate the route you will be taking to reach the destination.
Press the 53 button to stop or launch the simulation.
Press the 54 button to return to the start of the route simulation.
The speed of the simulation may be modified by pressing the 52 button.
During the simulation, you can view the speed limit 55 as well as details in the 51 area (distance remaining, arrival time and journey time).
Press area 51 to switch from the display of the remaining route time to the display of the expected arrival time.
The Navigation menu for electric vehicle and hybrid vehicle
From the home screen, press the card or press “Menu”, then “Navigation”. The configuration of the multimedia system depends on your vehicle’s engine. Additional menus and different settings are displayed.
For safety reasons, carry out these operations when the vehicle is stationary.
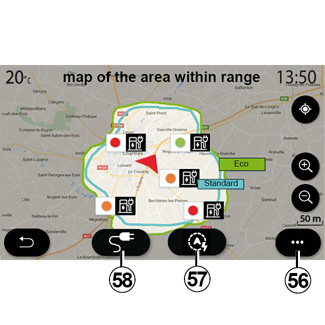
| “Reachable area” menu |

This menu shows the geographical area within range, according to the vehicle’s remaining charge level:
- the blue “Standard” area indicates the area within range during the current driving mode;
- the green Eco area represents the area in range if Eco mode is used.
Use the “Reachable area” button 57 to view the geographical area still within range once you have arrived at your next stage or at your final destination.
This map displays charging points available to your vehicle. Refer to the “Tone control” section to set the charging parameters.
Depending on the equipment, the “Charge” 58 button displays the list of the available charging points within range.
Use the pop-up menu 56 to display or hide Points of Interest (POI).
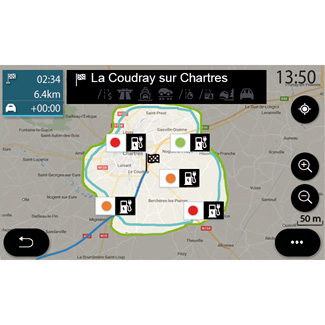
Last Charging Stations
The multimedia system informs you when the number of charging sockets located around your position is lower than 3. To deactivate the function, from the Navigation menu, select Settings then the Z.E. tab.
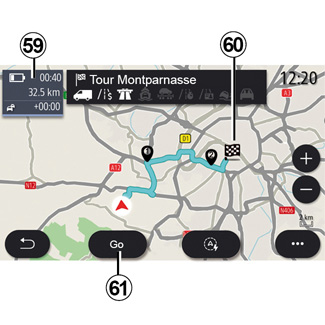
“Route”
From the “Navigation” menu, press “Menu”, “Route”, then “Overview” to view your full route.
Press the Go button 61. The multimedia system informs you if your destination 60 is in range (black) or not (red), depending on the vehicle’s charge.
The information field 59 displays the charge level remaining once you arrive at the destination.
For safety reasons, carry out these operations when the vehicle is stationary.
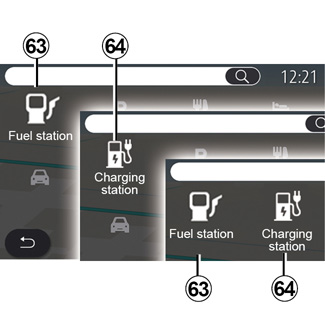
| “Points of interest” |

The configuration of the multimedia system depends on your vehicle’s engine:
- Fuel station 63 for internal combustion engine vehicles and hybrid vehicles (without charging socket);
- Charging station 64 for electric vehicles;
- Fuel station 63 and Charging Station 64 for hybrid vehicles (with charging socket).
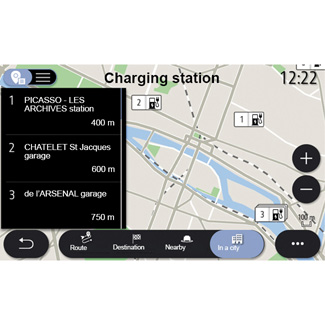
Charging station
The Charging Station POI 64 shows the charging stations around your position, along your route, around the destination or in a town or city.
Each station indicates the number of compatible sockets available for your vehicle.
Colour coding indicates the availability of the charging sockets:
- Green: socket available;
- Red: socket unavailable;
- Grey: status unknown.
Note: services must be activated in order to display the available charging points. Please see the section entitled “Activating services”.
Select one of the charging stations for more information:
- distance to and address of the station;
- payment type (free of charge, on subscription etc.);
- the number of charging sockets (available and total);
- the type of charging socket;
-...
From this menu you can:
- run navigation to the station;
- call the station;
- reserve a charging socket;
-...
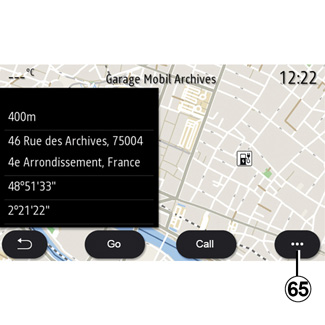
Use the pop-up menu 65 to:
- display “Online results”:
- “Reset” the search;
- save the charging point in your “Favourites”;
-...
For safety reasons, carry out these operations when the vehicle is stationary.