CHANGING A WHEEL
Switch on the hazard warning lights.
Keep the vehicle away from traffic and on a level surface where it will not slip.
Apply the hand brake and engage a gear (first or reverse, or P for automatic transmissions).
Ask all the passengers to leave the vehicle and keep them away from traffic.
If the vehicle is parked on the hard shoulder, you must warn other road users of your vehicle’s presence with a warning triangle or with other devices as per the legislation applying to the country you are in.
Do not leave the tools unsecured inside the vehicle as they may come loose under braking. After use, check that all the tools are correctly clipped into the tool kit, then position it correctly in its housing: there is a risk of injury.
The jack is designed for wheel changing purposes only. Under no circumstances should it be used for carrying out repairs underneath the vehicle or to gain access to the underside of the vehicle.
If you have a puncture, replace the wheel as soon as possible.
A tyre which has been punctured should always be inspected (and repaired, where possible) by a specialist.

Remove the wheel trim (refer to the information on “Wheel trims” in Section 5).
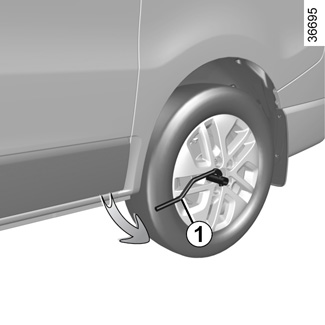
Use the wheelbrace 1 to slacken off the wheel bolts. Position it so as to be able to push from above.

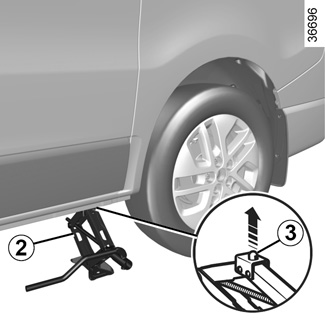
Insert the jack 2 horizontally; the jack head pin 3 should line up with the hole in the lower part of the bodywork nearest the wheel concerned.
Begin to crank the jack so that the baseplate is correctly positioned (it should be underneath the vehicle and aligned with the jack head).
Loosen the wheel nuts and remove the wheel.
Fit the emergency spare wheel in place on the central hub.
Tighten the nuts and lower the jack.
With the wheels on the ground, tighten the nuts fully and check if they are tight as quickly as possible.
Position the trim.
Anti-theft bolt
If you use anti-theft bolts, fit these nearest the valve (otherwise it may not be possible to fit the wheel trim).