PUNCTURE, EMERGENCY SPARE WHEEL
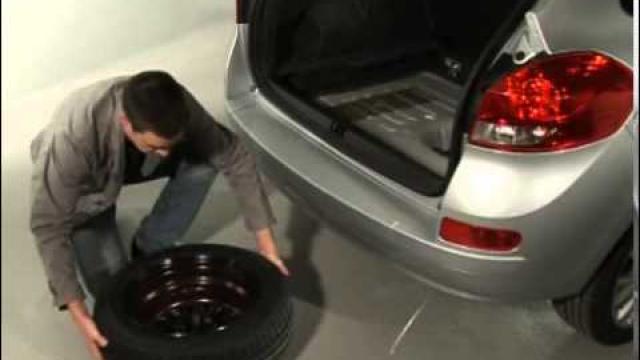
In case of puncture
Depending on the vehicle, a tyre inflation kit or emergency spare wheel is provided (refer to the following pages).
Vehicle fitted with a tyre pressure loss warning system
If under-inflated (puncture, low pressure etc.), the warning light on the instrument panel comes on. See “Tyre pressure loss warning” in Section 2.
If the vehicle is parked on the hard shoulder, you must warn other road users of your vehicle’s presence with a warning triangle or with other devices as per the legislation applying to the country you are in.
If the emergency spare wheel has been stored for several years, have it checked by your Dealer to ensure that it is safe to use.
Vehicle fitted with an emergency spare wheel that differs from the other wheels:
- Never fit more than one emergency spare wheel to the same vehicle.
- As the punctured wheel is wider than the emergency spare wheel, the vehicle’s ground clearance is reduced.
- Replace the emergency spare wheel as soon as possible with a wheel identical to the original one.
- When this is fitted to the vehicle, which must only be a temporary measure, the driving speed must not exceed the speed indicated on the label on the wheel.
- Fitting an emergency spare wheel may alter the way the vehicle usually runs. Avoid sudden acceleration or deceleration and reduce your speed when cornering.
- If you need to use snow chains, fit the emergency spare wheel to the rear axle and check the tyre pressure.
Emergency spare wheel
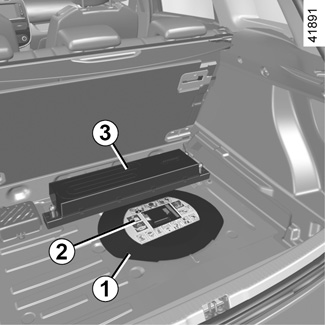
- Open the tailgate;
- lift the carpet;
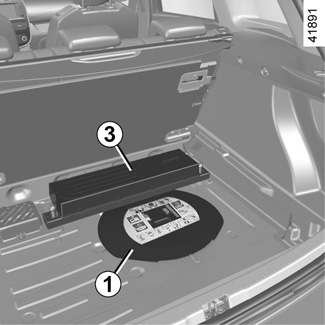
- lift the cover 1 and remove it;
- remove the tool kit by lifting it by its handles;
For vehicles fitted with this, take care not to damage the subwoofer 3 when you remove the cover 1 and the tool kit. If not, this could impair the correct functioning of the subwoofer.
The label 2 reminds you of how to operate the emergency spare wheel winch.
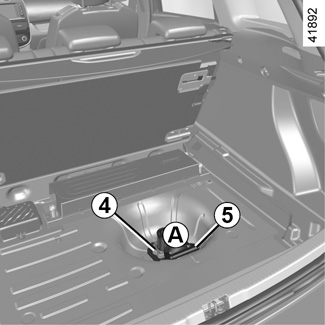
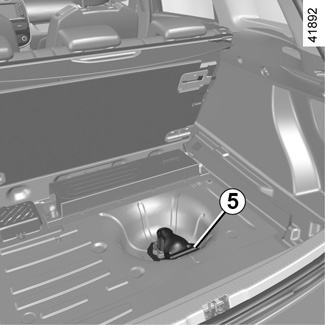
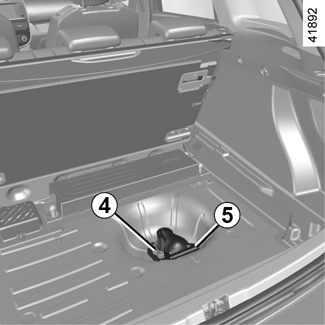
- unscrew nut 4 in an anti-clockwise direction until it comes off completely, then place the palm of your hand on section A of handle 5 and push towards the front of the vehicle. The wheel will be lowered;
- pull the wheel towards you;
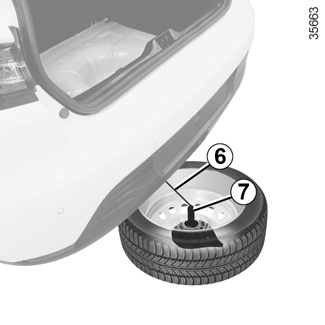
- lay the wheel down flat and unfasten cable 6 from its housing 7.
You may remove the wheel from its support.
When you push handle 5, the wheel will drop under the vehicle; risk of injury.
Ensure that everybody is kept away from the underside of the vehicle.
Do not touch the exhaust as it could burn.

To refit a wheel
To carry out this operation, the cable must be unwound.
If the cable has been wound back up on its own, unwind it again as follows:
- pull the handle to unwind the cable;
- press the button located under handle 5 to hold the unwound cable, then guide it down;
- recover the cable from underneath the vehicle.
You may refit the wheel.
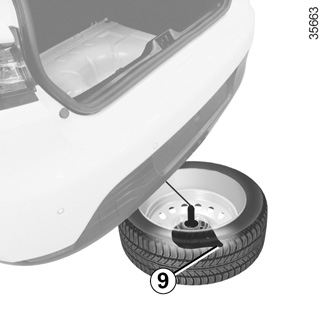
After changing a wheel, position the replaced wheel on support 8, with the valve facing the ground. Clip cable 6 in its housing 7, then push the wheel under the boot.
Ensure that tab 9 is positioned towards the rear of the vehicle.
Position yourself behind the vehicle and pull handle 5 to raise the wheel until it is anchored under the vehicle.
A wheel size larger than 15” cannot be installed under the vehicle.
Make sure that no-one has their fingers close to the cable when you move the handle: risk of injury.
To lock the system
- Press nut 4, screwing it on fully until it locks in place. Several turns will be necessary. This operation is essential to ensure that the wheel is secure;
- return handle 5 to its original position;
- clip the tool kit;
- replace the cover 1 then lower it and replace the luggage compartment carpet.
Note: If the tool kit does not lock in place, check the tightness of nut 4 and the correct positioning of handle 5.
Special features
The emergency spare wheel holder should always be present when you are driving even when the wheel itself is not present: risk of water entering the vehicle.
If you have to release it when it is not holding a wheel, push the centre of the wheel holder towards the ground while pressing handle 5.
For vehicles fitted with this, take care not to damage the subwoofer 3 when you replace the tool kit and the cover 1. If not, this could impair the correct functioning of the subwoofer.
The system should only be used with the original vehicle wheels or identical wheels.
It is essential to lock the nut so that the wheel is held securely.